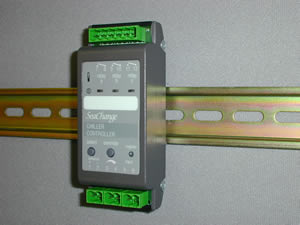
Feature Notes

Chiller Controller
with 3 x Triac Outputs

Features new this issue are in RED text

CLR / DIN / 3T /...


Main Features

Controls one or more Chillers in sequence

Variable Temperature (VT) or Constant Temperature (CT) Control

Collates Demand Signals from Multiple Zones

Demand routing: allows for transmission and reception of demand signals to and from other sub systems connected by ethernet.

Summary Features

General

The Chiller Controller is a derivative of the SeaChange Secondary Circuit Controller. It is especially configured to control one or two Chillers in sequence plus a Chilled Water Primary Pump. The Chillers can be operated based on cooling demand from other SeaChange devices or just on occupancy times. If flow and/or return sensors are connected the controller can maintain the desired Chilled Water temperature or alternatively the Chillers may have their own integral temperature controls and are simply enabled by the Chiller Controller whereby the sensors can still be connected for monitoring purposes but the control loops must be disabled using parameter CMDE.
Other configuration parameters can be set to allow operation to match the plant control requirements. A full table of configuration and monitoring parameters is detailed later in this data sheet.
A table of available product versions is shown on the last page.

Demand Control

The Chiller Controller receives Cooling Demand signals from its Consumer Modules. It collates the demand signals and calculates a setpoint which is then used to sequence the Chillers. In this way, the primary Chiller plant will run only when a demand for it’s services exists.

Intelligent Demand Filtering

The Chiller Controller has Intelligent Demand Filtering and can be set to produce a Demand for cooling only when certain criteria are met, e.g. when at least 5 Fan Coils of the 50 on a circuit are demanding Cooling - this would prevent a large Chiller from running when only 1 Fan Coil was demanding cooling energy.

Demand Routing over IT network

New at issue 4e1 the controller can send and receive demands to and from other sub systems connected via an Ethernet system. The demands are sent to a Global Heat/Cool source which is defined in the configuration as heat/cool source numbers greater than 9000. The best way to use this feature is to use the drag and drop configuration procedures built into the multi-network version of InSite (1.2.97 or later). The controller will also automatically receive the medium temperature from its remote heat/cool source. This allows a sub-system of controllers to send demands to a sub-system which contains the main plant or distribution equipment and receive back the current Flow temperature of the medium concerned.

Temperature Control

The Chiller Controller provides temperature control. The temperature setpoint used is calculated according to the Setpoint Type SPTY parameter;
1) SPTY=1 (or 2) uses the maximum (or average) Zone Demand to calculate a variable setpoint between min and max values.
2) SPTY=0 works to a fixed setpoint.
Different Output Driver types can be used for different types of plant configuration; Time Proportioning and Staged Drivers are available. The accompanying primary pump(s) can be switched using the Occupation Switch output C.

Description of Features

Occupation State of the Chiller Controller

The Chiller controller has no internal Occupation Time Schedules; instead it determines whether it is working in an Occupied Mode (controlling to its Occupied Setpoint) or Unoccupied Mode (controlling to its Non-Occupied Setpoint) by 3 methods:

A) Occupancy determined by Zone energy demands

In this mode the controller determines whether it is working in an Occupied or Non-Occupied mode depending on the Cooling Demand Signals it receives from the Consumer Modules registered to it.
The occupied or non-occupied state of the controller is determined by the settings of minimum demand MIND, minimum average demand MNAV and minimum number occupied MNOC. These parameters can be used singly or together. They are particularly useful when many Consumers are being fed from one large primary plant, and it is undesirable to allow this plant to run below a certain minimum load.

MIND minimum demand

The highest Demand signal from the Consumer Modules is compared with the Minimum Demand parameter MIND and if greater the Controller is put into occupied mode. Once occupied the Demand signal from the Consumers must drop below half the MIND setting to become non-occupied.

MNAV minimum average demand

The average Demand signal from the Consumer Modules is compared with this value and if greater the Controller is put into occupied mode. Once occupied the average Demand signal from the Consumers must drop below half the MNAV setting to become non-occupied. The average value is used to prevent a small demand from a single zone activating the controller.

MNOC minimum number of occupied zones

The number of zones occupied is compared with this value and if greater the Controller is put into occupied mode. Once occupied the number of occupied zones needs to fall below half the MNOC setting to become non-occupied.
To disable a particular test set the parameter to zero. If all three parameters are zero the Controller will become occupied if any Consumer Module is occupied.
If more than one test is in action (not zero) then the occupancy state is determined by ANDing the result of each test.
For example, if the settings are: MIND = 50, MNAV = 20, MNOC = 5
The Controller will become occupied when the highest Consumer Demand is greater than 50% and the average Demand is greater than 20% and at least 5 consumers are occupied.
Note if no temperature sensor is fitted then the controller operates in driver mode, passing on the highest or average demand (depending on the setting of SPTY) to the output stages but only whilst Occupied.

B) Occupancy determined by Occupancy Demand signals from another controller

In this mode the controller will enter the Occupied mode if any of the controllers Interconnected to it via Occupancy Demand enters Occupancy themselves.

C) Occupancy determined by external Volt-Free contact

Occupancy state of the controller can be influenced by an external VFC input.
Some circuits contain loads that are not controlled by SeaChange modules. As the SeaChange system is inherently demand driven, it is important that the energy requirements of all loads is accounted for, otherwise loads may not receive Chilled Water services when they need them.
To accommodate legacy systems with existing controls, the controller can be driven into an Occupied State by applying a Volt Free Contact to terminals “3-4”. If the parameter INMD is set to 3, a contact closure will force the Controller into Occupation. INMD = 1 is an “AND” function and INMD = 2 is an “OR” function with the functions described in A) and B) above, so a mixture of SeaChange controlled loads and non-SeaChange loads can be accommodated.

Demand Control

The demand signals sent to the Chiller Controller should sent as a % rather than a CT setpoint, thus HTCT should be set to 0 in all sending modules.

However the Chiller Controller can now decode received CT setpoints by converting them into a percentage demand and then prioritising this demand along with any other demands which are being received. This has been included so that the Controller still operates even if the sending controller has incorrectly been setup to send a Constant Temperature setpoint. This practise should be avoided wherever possible because the rescaling takes extra processing time and will limit the demand collation fan in which the controller can handle. HTCT setting in any controller should only be set if the target Controller is a Boiler and the Heat is being taken off the Primary of the Boiler.

Temperature Control

1) SPTY=1 or 2, Variable Temperature

The Controller controls the chilled water temperature according to a setpoint which is adjusted by demand signals from the Zone Controllers (or other Consumer Modules) registered to it.

Zone Trim

The maximum demand from all of the controllers registered to the Chiller Controller is used to rescale the setpoint between MINF and MAXF. Thus if the maximum cooling demand from the Zones etc is 100%, the setpoint will be set to MINF (for greatest cooling capacity); if the maximum demand is low, just a few percent, the setpoint will approach MAXF (for a lesser cooling capacity).
If the parameter SPTY is changed from its default value of 1 to 2, this will cause the average value of Zone Demands to be used instead of the maximum.
These setpoint calculations remain active when the Controller is in an Occupied state (see Occupation State, earlier in this document). At all other times, it will control to its non-occupied setpoint, NOSP.

Pump Control and Demand

The default settings of MIND, MNAV and MNOC will cause the controller to shut down when all loads are satisfied (ie no cooling demand). This is best practise for energy efficiency; however, if space temperature sensors are badly sited or not representative of the entire zone temperature, it may be necessary to disable this feature. If it is desired for the controller to run at all times during any Occupancy period, then MIND, MNAV and MNOC should all be set to zero; energy losses due to unnecessary circulation of water or overcooling of the space may result, however.

2) SPTY=0, Constant Temperature

The Controller controls to a Constant Temperature Setpoint, set on parameter MAXF (MINF is not used in this application) when the Controller is in an Occupied state (see Occupation State, earlier in this document).
At all other times, it will control to its non-occupied setpoint, NOSP.
The default settings of MIND, MNAV and MNOC will cause the controller to shut down when all loads are satisfied (ie no cooling demand). This is best practise for energy efficiency; however, if space temperature sensors are badly sited or not representative of the entire zone temperature, it may be necessary to disable this feature. If it is desired for the controller to run at all times during any Occupancy period, then MIND, MNAV and MNOC should all be set to zero; energy losses due to unnecessary circulation of water or overcooling of the space may result, however.

Temperature Sensors and Inputs

Depending on the application, one or more sensors can be used for temperature control. The standard flow temperature sensor is connected to input ‘temp b’ on terminals 5 and 6. The optional input ‘temp a’ on terminals 3 and 4 can either be used for a return temperature sensor or alternatively a VFC input. The behaviour of the two inputs are configured by parameters SACT and INMD.

Two Temperature Sensors

Input 3-4
Optional Sensor
Input 5-6
Flow Sensor
INMD = 0
 
SACT = 0
Control on control sensor only
Optional sensor for monitoring
SACT = 1
Control on average of two sensors
SACT = 2

Control on maximum of two sensors

SACT = 3
Control on minimum of two sensors

Flow Sensor and external Control Status input

Input 3-4
External occupancy VFC input
Input 5-6
Flow Sensor
SACT = 0
 
INMD = 1
Occupancy determined by own
occupancy state AND external i/p
Use for Interlock with flow switch
INMD = 2
Occupancy determined by own
occupancy state OR external i/p
Use for external occupancy override
INMD = 3
External occupancy signal only
Use for external timeclock control
where no Zone Controller used

Flow Sensor and external Alarm Monitor input

Input 3-4
External monitor / alarm VFC input
Input 5-6
Flow Sensor
SACT = 0
 
INMD = 4
Monitoring Input if ALRM = 0; Alarm Input if ALRM > 0
INMD = 5
Pump readback monitor
Generates alarm if no status readback from pump (via DP switch etc ) within 30 secs (set ALRM > 0)
ALST = 0
0 = Alarm State, 1 = Normal
ALST = 1
0 = Normal, 1 = Alarm State

Sensor calibration

The resultant control sensor value (flow sensor input alone, or flow and return sensors combined as set by SACT) can be adjusted by calibration parameter SCAL.

Operation with no sensor fitted

Like many SeaChange Modules, the Chiller Controller can work with or without a Temperature Sensor; the act of connecting the sensor (or not) determines in which mode the Controller will work.
With a sensor connected, the Controller will use its internal Fuzzy Logic control loop to control its outputs according to the appropriate setpoint. This is called Closed Loop control.
If no sensor is fitted (or the sensor is disconnected) the Controller will effectively bypass its control loop, and the Zone Demands (either Maximum, or Average Demand according to the value of SPTY) will be used to drive the plant directly (thus if the Zone Demand is 70%, the control output will be 70%). This is called Open Loop control.
Sometimes, Open Loop operation is required but the sensor is needed for monitoring (for instance, if the Controller was being used to enable a Chiller with its own temperature controls, then the Controller’s own control loop would need to be disabled). In these cases, setting parameter CMDE = 0 will disable the control loop, allowing Open Loop operation, whilst leaving the sensor connected for monitoring purposes.

Submodules

The Chiller Controller can have up to 2 actuator or changeover submodules registered to it, and also up to 8 condensation sensors sharing a common address.

Condensation Sensor

Intelligent condensation sensors can be registered to the controller. The state of the condensation sensors can be monitored on input I4 and if the alarm mode is set, can be used to generate alarms. Up to 8 sensors can be registered, sharing the same cloned address.
When the sensor detects that condensation is present, the cooling demand is progressively reduced to zero. Cooling control recovers a few minutes after condensation is no longer present.

Frost Protection

The Heating versions of Secondary Circuit Controller have their own Frost Protection Setpoint, FRSP, which if violated, will cause the Controller to run its pump and send demand signals to its Heat provider (Cooling versions and the Chiller Controller have a similar over-temperature setpoint NOSP). Additionally, if the Boiler Controller (which is responsible for global Frost Protection in a Seachange system) enters Frost Protect mode, the Chiller Controller will run its pump(s) to allow water circulation using parameter FRPT.

Pump Control Interlock

Twin Pumpsets (using Changeover Submodule)

The Chiller Controller outputs can be interlocked with the status of pumps controlled by a Changeover submodule.
When the interlock pump switch ILKP = 1 the Chiller controller ensures that flow has been established by the Changeover Submodule before allowing any of its outputs to be energised. Setting ILKP = 1 will automatically set ALRM to 1 or higher.
If subsequently both pumps fail, the Chiller Controller will shut down and generate a PMPF pump failure alarm. The Chiller controller will remain disabled until the Chiller Controller Override button is pushed, or ILKP is reset.
When the established flow switch ESTF = 1, the Secondary Circuit Controller will wait for pumps to run for the minimum on time before outputs are energised.

Single Pump (using Occupation Output)

When a single pump is driven from the occupation output on the Chiller Controller, INMD = 5 and ALRM = 2 or 3, the control outputs are disabled if the pump readback signal goes into alarm. The pump remains disabled until the readback signal is fixed, the Override button is pushed or the ALRM parameter is set to zero.
The pump (occupation output) can also be set to delay its start after the outputs have started, or to run on after they have shut down, using the configuration parameter CDLY. A negative value will start the pump the defined number of minutes after the outputs have been enabled; a positive value will cause the pump to run on after the outputs have shut down. This feature does not apply to the operation of Changeover Submodules which have their own run on feature built in.
The interlock features can be particularly useful when controlling packaged chillers.

Alarm Handling

The Chiller Controller may be set to ignore alarm conditions, report them to a SeaChange Doorway Supervisor (either locally connected to the system, or via an autodialling modem), or to both report alarms and take some control action. The ALRM parameter is used to select the desired Alarm Mode.
The controller generates an alarm if the sensor fails and also if the external alarm input is used. The sense of the alarm input can be set by parameter ALST.
The controller may be set to respond to the STOP System Stop Alarm which is generated by another Controller; this can be used to shut down the entire control system, or parts of it, if a particularly critical event occurs. See Boiler Controller datasheets B1 or B2 for more details about the System Stop Alarm.
Alarm codes as they appear at Doorway Supervisor and InSite tool:
NOAL
No Alarms.
All alarm conditions cleared in this Module.
SENF
Sensor Failed.
EXTN
External alarm generated by VFC input.
CNDF
Condensation Failure
PMPF
Pump Fail (readback alarm) generated by VFC input (INMD = 5) or registered PCO Submodule.
STOP
System STOP alarm received.
All outputs shut down if ALRM = 3 or 4.

Local Indication of Alarms

Alarms are indicated by red flashing of the Temperature Indicator (Thermometer) LED, if the alarm results in a control action (e.g. shutting down the pump/valve). If ALRM is set to 0 (ignore alarms) or 1 (report alarms to supervisor only) then no control action will be taken, and the thermometer LED will not flash.

Commissioning

Setup Mode : Timing Characteristics of Output Channels

It is possible to set the stroke time (for Raise/ Lower type Actuators) and the minimum on/off time (for Time Proportion type Actuators) using pushbuttons.

Raise/Lower Types - Setting Stroke Time

  1. Hold down Select until Temp lamp flashes
    Temperature indicator will flash red at one second intervals.
    Release select button; output B will energise to close valve.
  2. When valve is closed press Select
    Temperature indicator will flash green and output A will energise to open valve. The controller is now measuring the stroke time.
  3. When the valve is open press Select
    Flashing will stop and stroke time is now set and stored in non-volatile memory. This time will be retained until the procedure is repeated.
Note: if a Stroke Time of less than 30 secs is set using pushbuttons then the setup process is aborted. Temp indicator flashes amber rapidly for 5 secs indicating an invalid period. This allows checking of wiring without affecting Stroke Time setup. Stroke Times less than 30 secs can be entered manually via Zone Controller or InSite tool.
TP Types - Setting Minimum Time On/Off
  1. Hold down Select until Temp lamp flashes
    Temperature indicator will flash green at one second intervals and relay A will energise.
    Release select button.
  2. When minimum on/off time has elapsed, press select
    Flashing will stop and this time will be set and stored in non-volatile memory. This time will be retained until the procedure is repeated.
    Note that the full TP period will be 10 times this value.
The times can also be viewed and changed using parameters HPRD (heating) and CPRD (cooling).

Manual Override

Allows the outputs to be exercised during commissioning and maintenance activities. Holding the override button pressed until the Status Lamp flashes green will cause the controller to be switched from automatic control to Override Mode. Subsequent pressings of the manual override button will cycle through the available Override modes.
  1. Hold down Override until Status lamp flashes
    Controller changes to Override Mode and becomes Occupied, controlling to current Occupied Setpoint.
  2. Press Override again
    Controller changes to Manual Mode and output is set to 100% heating.
    Temperature lamp shows red.
  3. Press Override again
    Controller changes to Manual Mode and output is set to 100% cooling.
    Temperature lamp shows amber.
  4. Press Override again
    Controller cancels Manual Override and reverts to automatic control.
As this feature does not time out, care should be exercised to ensure the module is returned to the automatic mode on completion of the commissioning or maintenance activities.
Occupancy Override can also be achieved via Doorway and InSite; using AUTO and OVRD monitoring parameters. The status lamp indication shows a different sequence.
Override from Off to ON : Status lamp flashes long ON, short Off
Override from ON to Off :
Status lamp flashes long Off, short ON
See our ‘Design Guide’ publication for details of the Override features.

Registration

Registration is the simple process by which logical connections are made between Controllers in a SeaChange system; it is done during commissioning and involves pressing buttons on the Controllers in a specific sequence.
For further details of the registration process, see our ‘Design Guide’ publication.

Address Allocation and System Housekeeping

Like all SeaChange Controllers, the Chiller Controller must be registered with other modules in order to create a working system. During the Registration procedure, the address of each Controller is allocated by the module that contains System Housekeeping. Check that you have an appropriate System Housekeeping Module; see our ‘Design Guide’ publication.

Interconnects

The Chiller Controller may receive signals from a Zone Controller or other Consumer module, either by Zone Energy Demand or Zone Occupancy Demand signals (see Occupation State section). It may also send signals to other modules (e.g. a Pump Changeover submodule when the controller’s secondary circuit has a twin pump set).
These Interconnects are put in place by Registration; again, see our ‘Design Guide’ publication.

Options and Product Codes

Chiller Controller

CLR / DIN / 3T / [driver option]

Driver options

Option

Output A

Output B

Output C

/ 201
Time Proportional
Not used
Occupation or Optimum start switch
/ 208
Sequence 2 triacs at 33% and
66% of demand
Occupation or Optimum start switch


Input Configuration

Input 3-4 ‘input a’
Return Sensor (optional) or VFC status / alarm / occupancy (optional)
Input 5-6 ‘input b’
Flow Sensor

ENER-G Controls

ENER-G House
Daniel Adamson Road
Salford
Manchester
M5 2DT

phone 0161 7457450
fax 0161 7457457

www.energ.com
www.seachange.co.uk
www.smartkontrols.co.uk